

In this post I describe how to create widgets that will work on a multilingual site. The main plugin I use for this is Polylang. The template used for this demo is OceanWP but the functionality should be the same in most templates.
When we’re finished you’ll end up with a French (left) and English (right) versions of the content as shown below, which automatically switches when the you switch between languages.

1. Open the Widgets Editor
First, open the Widgets editor and select the widget you want to customise. In this example I’m editing the General Sidebar, which is a custom sidebar I created using the OceanWP Theme Panel.
2. Add and Update a Custom HTML block for the English Version
For the English version, set up a Custom HTML block, set the language to English, leave the Title blank, and put in the code.
/* Heading and Action Buttons - ENGLISH */

<h3 class="sidebarcustomhead">
	Explore the Chateau
</h3>
<p class="button">
	<a href="interior-gallery">Interior Gallery</a>
</p>
<p class="button">
	<a href="grounds-garden-gallery">Grounds & Garden Gallery</a></p>
	<p class="button">
	<a href="amenities">Amenities</a></p>
		<p class="button">
	<a href="our-rooms">Bedrooms</a>
</p>
<br>
<br>

/* List of Amenities using Font Awesome Icons - ENGLISH */

<h3 class="sidebarcustomhead">
	Our Facilities
</h3>
<ul class="address-info list-unstyled"><li>
	<i class="fas fa-wifi"></i>Internet access<br>
	<i class="fas fa-bed"></i>Superking beds<br>
	<i class="fas fa-users"></i>Fresh towels<br>
	<i class="fas fa-bath"></i>Luxury ensuite bathrooms<br>
	<i class="fas fa-swimming-pool"></i>12 x 6 M inground swimming pool<br>
		<i class="fas fa-trophy"></i>International pétanque court<br>
		Pattered garden<br>
		</li>
</ul>
<br>

/* Heading and Action Buttons - ENGLISH */

<h3 class="sidebarcustomhead">
	Contact Us
</h3>
<p class="button">
	<a href="contact">Ask a question</a>
</p>
<p class="button">
	<a href="booking-availability">Make a reservation</a>
</p>
With the content pasted into your Custom HTML block, click Save.
3. Add and Update a Custom HTML block for the French Version
Next, add a new Custom HTML block to the same widget, to use for the French version.
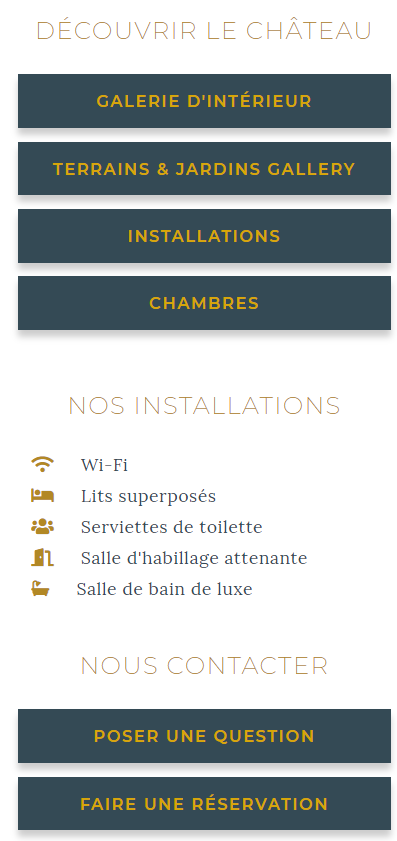
For the French version, set the new Custom HTML block to Français, leave the Title blank, and then paste your code into the Content area. My code looks like this:
/* Heading and Action Buttons - FRENCH */

<h3 class="sidebarcustomhead">
	Découvrir le château
</h3>
<p class="button">
	<a href="interieur-galerie">Galerie d'intérieur</a>
</p>
<p class="button">
	<a href="terrains-jardins">Terrains & Jardins Gallery</a></p>
	<p class="button">
	<a href="installations">Installations</a></p>
		<p class="button">
	<a href="nos-chambres/">Chambres</a>
</p>
<br>
<br>
<h3 class="sidebarcustomhead">
	Nos Installations
</h3>

/* List of Amenities using Font Awesome Icons - FRENCH */

<ul class="address-info list-unstyled"><li>
	<i class="fas fa-wifi"></i>Wi-Fi<br>
	<i class="fas fa-bed"></i>Lits superposés<br>
	<i class="fas fa-users"></i>Serviettes de toilette<br>
	<i class="fas fa-door-open"></i>Salle d'habillage attenante<br>
	<i class="fas fa-bath"></i>Salle de bain de luxe
	</li>
</ul>
<br>

/* Heading and Action Buttons */

<h3 class="sidebarcustomhead">
	Nous contacter
</h3>
<p class="button">
	<a href="contact">Poser une question</a>
</p>
<p class="button">
	<a href="booking-availability">Faire une réservation</a>
</p>
With the code added, click Save.
Now your widget should look something like this:

Now it’s almost ready to use – but first we have some styling to do.
4. Set Up the Custom CSS
If you’re familiar with CSS you will have noticed a couple of custom CSS classes are referenced. These are:
<h3 class="sidebarcustomhead">and
<p class="button">For these two classes to work, you must add these to the Custom CSS block in the Customiser. These two classes – sidebarcustomhead and button – define the layout of the header (e.g., in the English version, “Explore the Chateau”) and the button (e.g., in the English version, “Interior Gallery”).
Don’t worry about the Font Awesome icons list. That isn’t covered in this post but will be documented soon.
To create the same look and feel as the buttons used in this example, copy the code below.
/* Button Styling */

.button {
  text-decoration: none;
  display: inline-block;
  font-size: 12px;
	font-family: Montserrat;
	margin:0px 10px 10px 0px;
	  box-shadow: 0 5px 5px 0 rgba(0,0,0,0.2), 0 5px 5px 0;
	width: 100%;
}

/* Header Text Styling */

.sidebarcustomhead {
  font-weight: 200;
  text-align: center;
  padding-top:10px;
}
The sidebar inherits the majority of it’s styling from the h3 CSS definition (colour, font-family, etc.) and since, in this example, I don’t want this to change, I have only redefined three of the styling parameters:
- font-weight
- text-align
- padding
While the sidebarcustomhead class is used only in the sidebar, the button class is used more widely across the site. This is because I prefer the level of control you have when using CSS than relying on the (often limited) button styling options that are available via the Customiser.
All done!
With those components in place you’ll have custom multilingual sidebars with custom heads and button styling.
If you need help with this or any other aspect of your home or business IT, contact me to arrange a free consultation.


